Showing posts with label housewife in training. Show all posts

Saturday, July 9, 2011

What I'm Cooking: Chicken Tacos, Elote (Corn) and Black Beans...Mi Gusta!

I had Tuesday through Friday off so I used that time productively.  On one occasion, I made one of D's favorite meals (at least that I make).  Presenting Tacos frescos, pollo a la parrilla con Elote y Frijol Negros (Fresh, grilled chicken tacos with Corn and Black Beans). 

So easy to make and easy on your waistline without sacrificing flavor!


Tacos:
  • Corn Tortillas
  • Grilled chicken seasoned marinated with Montreal Steak Seasoning, olive oil, chili powder, and cayenne pepper
  • Salsa: halved cherry tomatoes, diced red onions, avocado chunks, fresh cilantro, squeezed lime juice, s/p to taste
  • shredded cheddar cheese
Elote:
  • 3 small ears of corn cut from the cob
  • 1 tablespoon of mayonaise
  • 1/4 cup grated parmesan cheese
  • 1/2 lime squeezed (juice only)
  • small handful of fresh, chopped cilantro
  • 1/4 teaspoon cayenne pepper
  • s/p to taste
Black Beans
  • Low sodium black beans (rinsed out completely with water)
  • 1/4 teaspoon garlic powder
  • s/p to taste

Wednesday, June 29, 2011

What I'm Cooking: Summer Food!

Here's some of the great meals I've been cooking (or rather, preparing) lately.  I'll let the pictures do most of the talking.


I got these fabulous Chipotle Black Bean Burgers by MorningStar Farms from Costco and served it (just like I had sampled it in-store) on a 100% Whole Wheat Sandwich Thin and added my fave Romesco Sauce by Country Mouse City Mouse 's...GENIUS!  I also nibbled on Spicy Red Pepper Hummus with veggies and a serving a Oikos Blueberry Greek Yogurt.


I overendulged and snacked while at work one day so I felt compelled to eat light...yet flavorfully at dinnertime!  Here I have Simply Baked Salmon with a light sprinkling of low-sodium Montreal Steak Seasoning and drizzled with a balsalmic glaze.  It is accompanied by half of a baked sweet potato with a dusting of All Spice and canned greened beans (would've prefered fresh but didn't feel like running to the grocery store).


This meal is super easy-peasy but does involve lots of chopping!  I boiled water and cooked whole wheat penne pasta to al dente.  In the meantime, I took the veggies from Pic 1 (garlic, zuccini, yellow squash, mushrooms and cherry tomatoes) and combined with Ragu Chunky Mushroom Tomato Sauce and diced grilled chicken.  Once everything was cook through, I combined them all together and sprinkled with a bit of crushed red pepper and shredded Italian cheese.  I tossed all the ingredients in Pic 3 (avocado, cucumber, cherry tomatoes, red onions, and red pepper strips) with a Romaine Lettuce Mix and served a side a Champagne Vinaigrette.  I felt like I was having a dinner affair with myself! So romantic!

What I'm Making: My first official furniture redo!

So I officially can't stand it.  I haven't blogged in over 3 weeks while settling into our new, beautiful home.  Uverse is supposed to be coming out next week to install after originally telling D it wouldn't be until JULY 21st!! So in the meantime, I've surmounted a pile of unfortunate circumstances: (1) Again, no cable or Internet; (2) No working AC [another lovely discovery right when the previous owner was moving out & we were moving in but should be taken care of in the next week or so]; (3) D is out of town on a family vacation until Sunday :(  ; and (D) the absolute cherry on the top of the Crappy Week Cake...my blackberry's track ball is stuck which is preventing me from using most of my apps including Twitter and Facebook [now I have my eye on the new EVO 3D phone].  I feel so lonely and disconnected from the virtual world, unable to blog and tag and IM at my leisure so I've resorted to doing ancient activities, almost unheard of nowadays, like... reading a book!!! One with actual paper pages, and all.  Over the weekend, I read The Reader by Bernhard Schlink which makes me want to rent the movie starring Kate Winslet and Ralph Fiennes.   Now I'm on to Night by Elie Wiesel.  Don't ask me why I'm on a WWII/Holocaust era kick but I find the time period fascinatingly bizarre, heart wrenching and dark yet the eyewitnesses and storytellers still retain their humanity.  Night is a short, not necessarily easy, read.  I should be done with it tonight. 

On Sunday, I decided to finally put my money where my mouth is and redo the vanity desk I bought nearly a year ago and was determined to transform.   I was driving down College and at around 30th St. I saw a woman having a yard sale.  And this little gem is what I ended up with:


I have to admit, I walked into this project and, more specifically, Menards rather sheepishly.  I had done a bit of research online and read through the many furniture transformation and home decor blogs.  I felt like I had a grasp of what I needed to do and what tools I needed to buy but once the sliding doors opened up, my anxiety hit the roof.  I eventually made my way over to the back corner of the store and into the sand paper aisle.  I bought a variation of sand paper and sponge-like sanders.  Then I looked at stain stripper.  I decided to choose a brand I was familiar with, Zinsser.  I went back and forth between the rub on and the spray on.  I think next time I'm going to go with the spray.  Stain stripper is a nasty, nasty thing.  I wasn't using my head when I thought I could use cheap, kitchen gloves.  That stuff ate through to my skin immediately.  Luckily, my neighbor had some chemical resistant gloves.


I also grabbed a small tub of vinyl wood filler which serves as a putty to patch the holes.


I had to have a sales associate help me select an slightly off white paint and primer, of which I went with a Rustoleum brand.  Upon a second trip to Menards, I grabbed rollers which made paint application so much easier.  I eventually settled on some hardware that I was okay with because, apparently, 2.5" is not a popular size for drawer-pull hardware.  I didn't feel like spackling up the original holes and remeasuring out new ones so I just went with one of few options that were cheap, black, and 2.5".

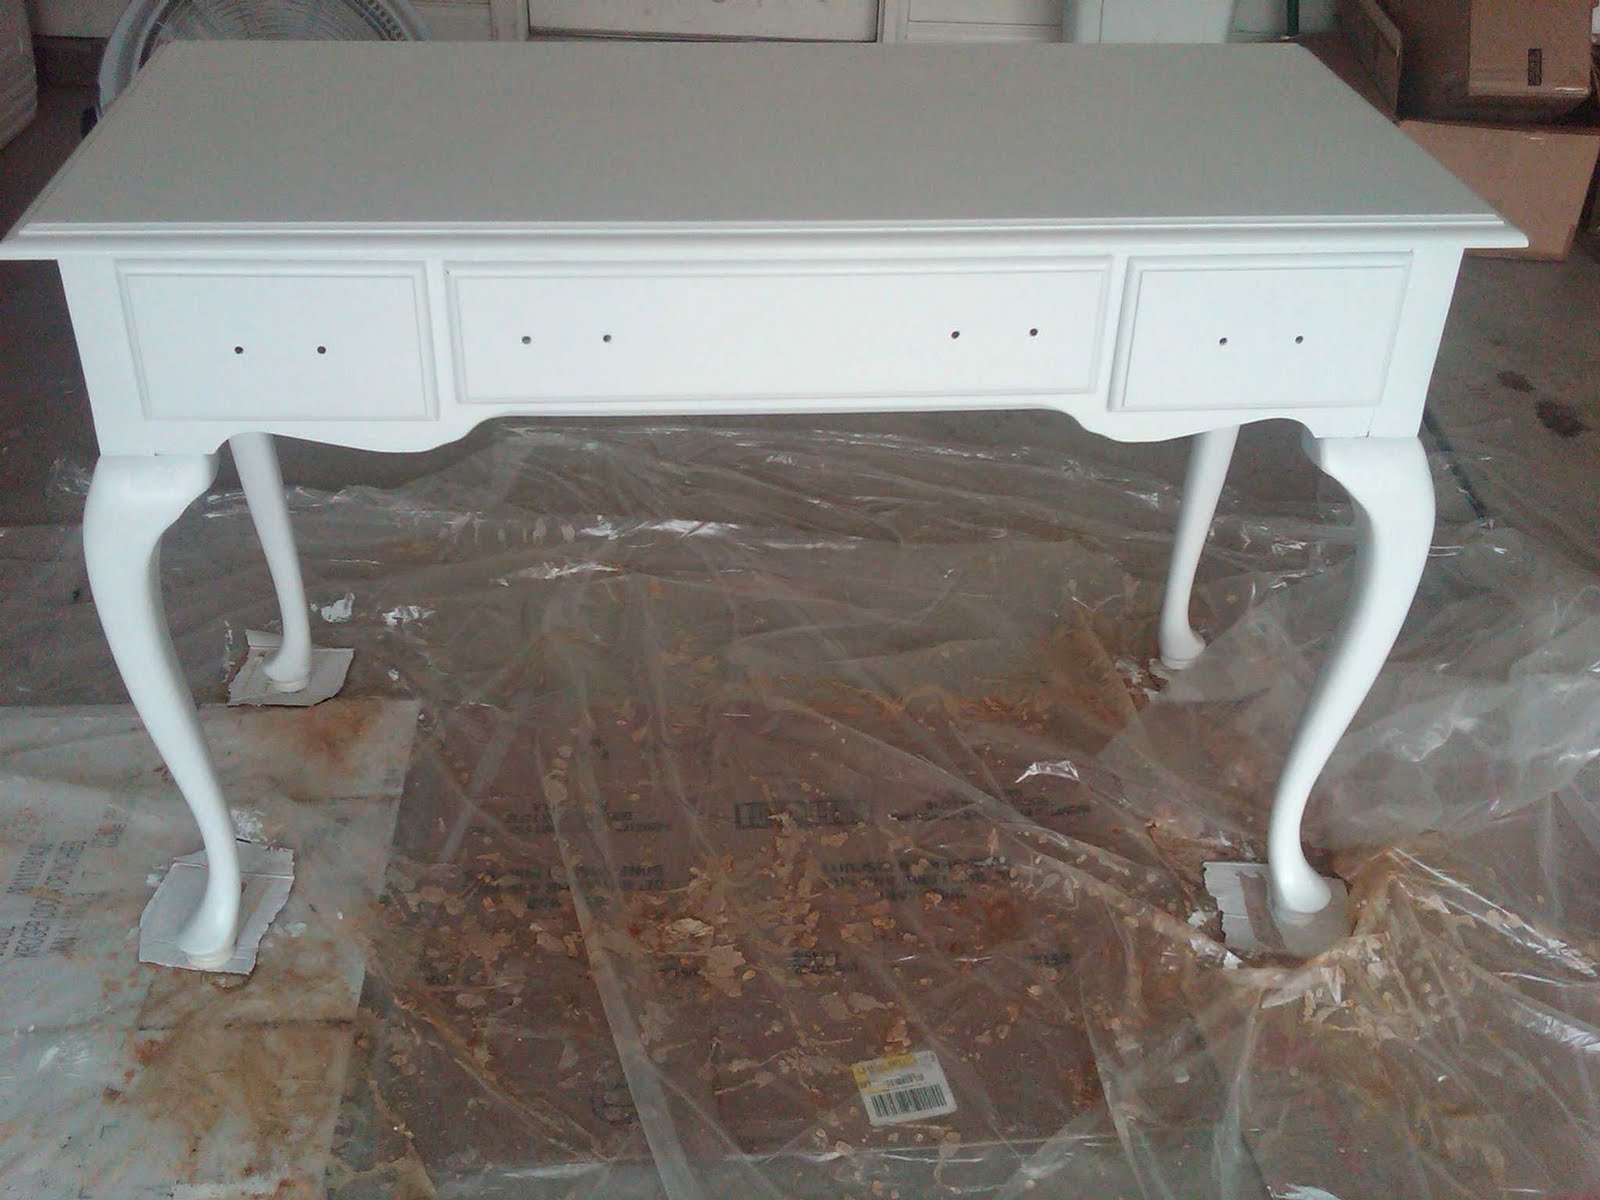
Once the table was completely stripped of the original cherry stain (a long, tedious process), it was ready to be patched, sanded and primed. 


Now, I have to be honest, I got lazy about the whole sanding process since I would have to do it by hand.  I eventually want to buy an electric sander.  Once the wood putty dried I tried to sand it down to be flush with the top surface of the table but as you can see, it didn't work out too well.  It doesn't really bother me.  Next, I applied a layer of primer to all surfaces and the insides of the drawers.  I used brushes for the primer layer which took forever and hurt my wrists (total weenie). 


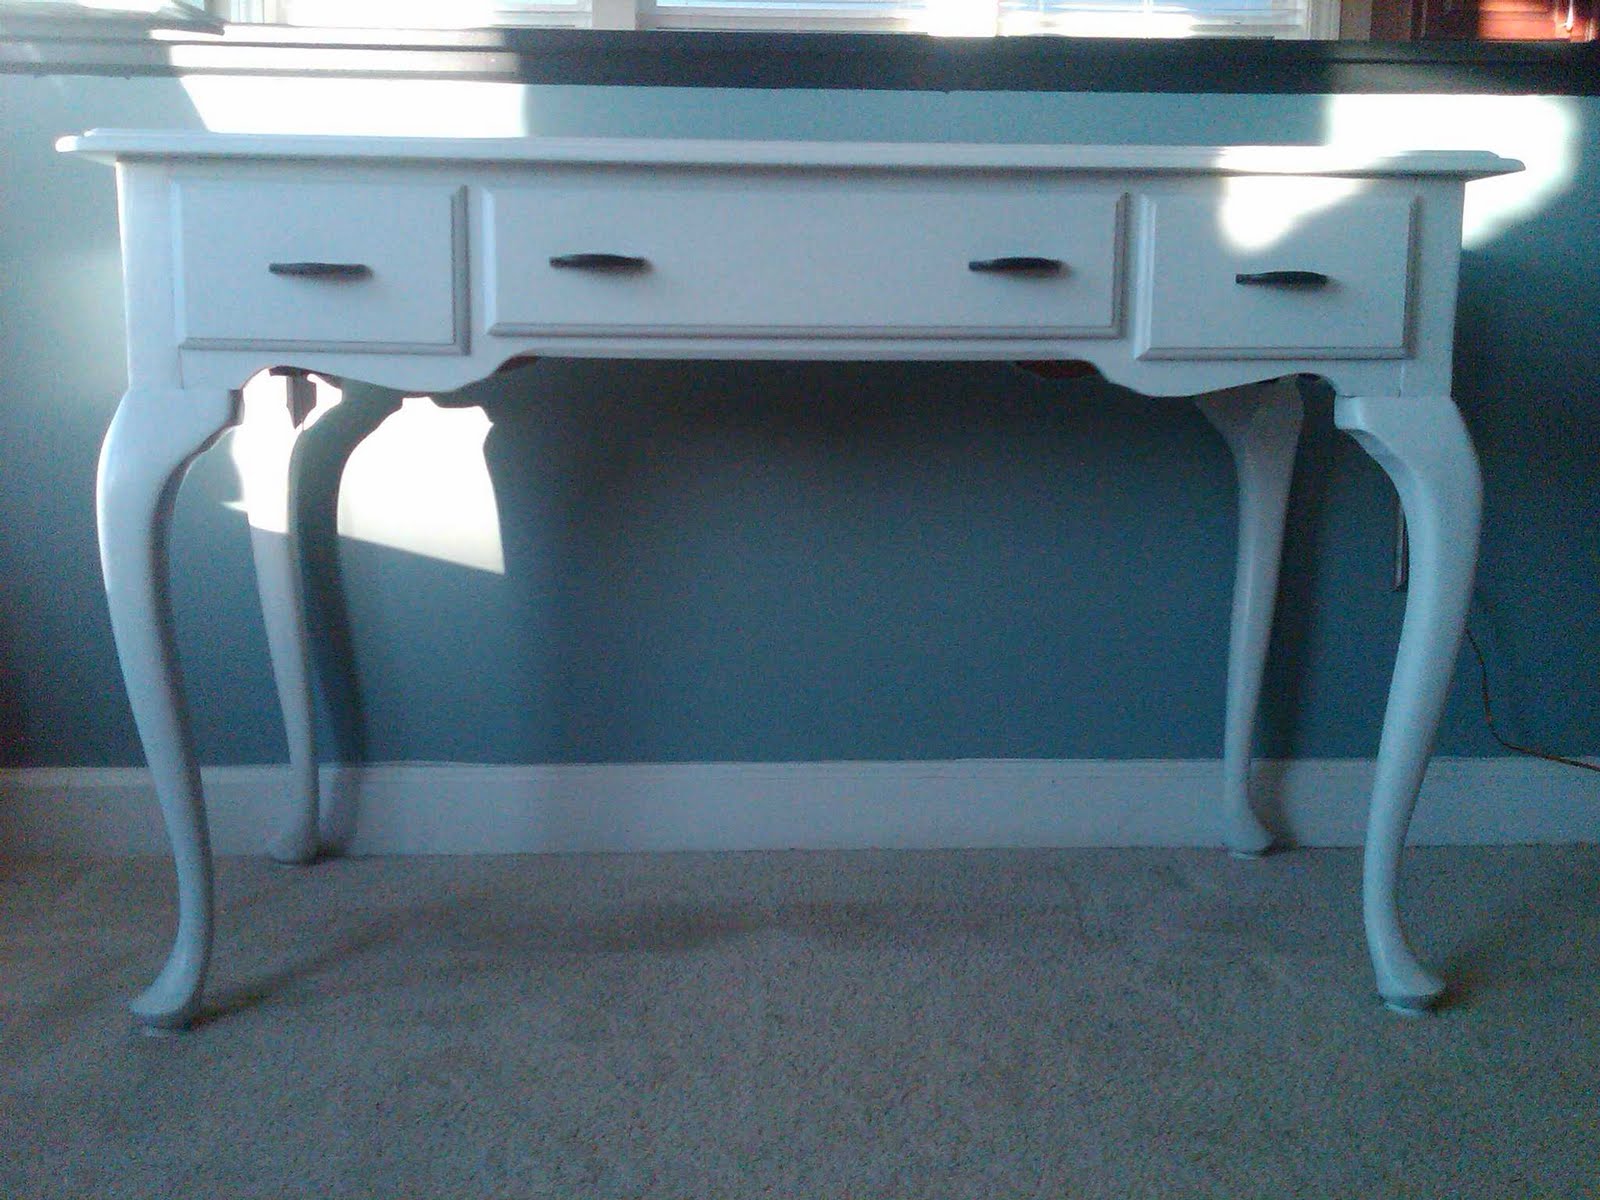
The following day, I tackled the painting.  I used a combo of rollers and small brushes to apply to layers of paint.  I used a large fan to help things move along.  They dried very quickly and smoothly creating a final product I was very happy with.


I stood marveling it for several minutes and, of course, sent a copy of it to D.  I was originally planning to put it in the entry hallway by the front door but it was a little bigger than I thought so I put it near the half-wall that separates the living and dining/sunroom.  Now I just need to find the right stuff to accessorize!


It's amazing what people can do when they tune out, turn off and disconnect from their normal, everyday lives.  I can't wait to tackle the end tables I just bought from my new neighbor who is moving to AZ in the next few weeks.  She even threw in a can of dark stain that she just never got around to doing.

Wednesday, May 11, 2011

What I'm Cooking: Cake Balls...A Love Affair

Several months ago Fefe's introduced me to some cake balls her sister had made and it truly was --- love at first bite!!!  They are cake and icing encapsulated in a chocolate-y coating.  The hardened coat of chocolate locks in the moisture and it is just heavenly.  Since then, we have been engaging in this secret romance.  Our paths cross occasionally and I can't get enough.  They are one of few guilty pleasures I indulge in while on my fairly restrictive eating regiment.  I had been contemplating taking a stab at making my own ooey, gooey, oh-so delectable cake balls after gaining some tips on the web.  Sounded simple enough.  I had all the ingredients already so when a girls' "catch up" luncheon was on the agenda, I thought that this would be great opportunity to flex my housewife-in-training muscles. 

Here's what I came up with:
Not the prettiest things but I'll tell you why when you read on....
Let me start at the very beginning....

1) Take a box of store bought cake mix and cook it as directed.

2) Once cake is fully baked, crumble completely in a mixing bowl and let it cool to room temperature.

3) Mix the crumbled cake with 3/4 can of store-bought icing (I chose Cream Cheese flavored).  I used the whole can which I think was just too much.  I used an electric beater on low to stir and mix evenly. 

4) Set the icing-cake mixture in the freezer for at least 1 hour to let firm up.

5) Take the mix out of the freezer and roll into balls, placing them on wax paper over a cookie tray .  I made them about the size of a medium meatball.  I then stuck the tray and cake balls back in the freezer  and left them there overnight.

6) When I came back to them, they were firm but not rock hard which was perfect for sticking a toothpick in to dip in the dark chocolate.

7) I brought water to a boil in a pot.  Then, I put the dark chocolate in a glass bowl and reduced the temp.  The chocolate needed constant stirring and attention but started to melt fairly quickly.  I made the mistake of adding splashes of soy milk to soften the chocolate up.  This led to the chocolate not re-hardening to it's original state, therefore, they turned out more like goo balls than the bon-bon like cake balls i've tried.  Lesson learned!  I also ended up using a large pot of water than pictured below but you get the point.
8) I topped half the cake balls with a generous sprinkling of Trader Joe's English Toffee (a gift from my Mama) that I used a hammer to crush up and left the other half plain.  Once they were all coated in chocolate, I set them back in the freezer until they were ready to go. 
 

They didn't transfer to the glass dish well
So it wasn't a total disaster but I made some amateur mistakes.  I kept referring to them as poo balls which luckily didn't detour people from eating them.  They were even more squishy after sitting out on a counter for a few hours.  Definitely, don't add milk to the chocolate. 

The next time around, I am going to use less icing and of course, no milk.  I'm also going to be more adventurous with the cake, icing and coating flavors.  These are wonderful for luncheons, bridal showers, gifts, etc.  Stay tuned for Cake Balls...A Love Affair 2!!!

If you've tried these before, what flavors did you use?